
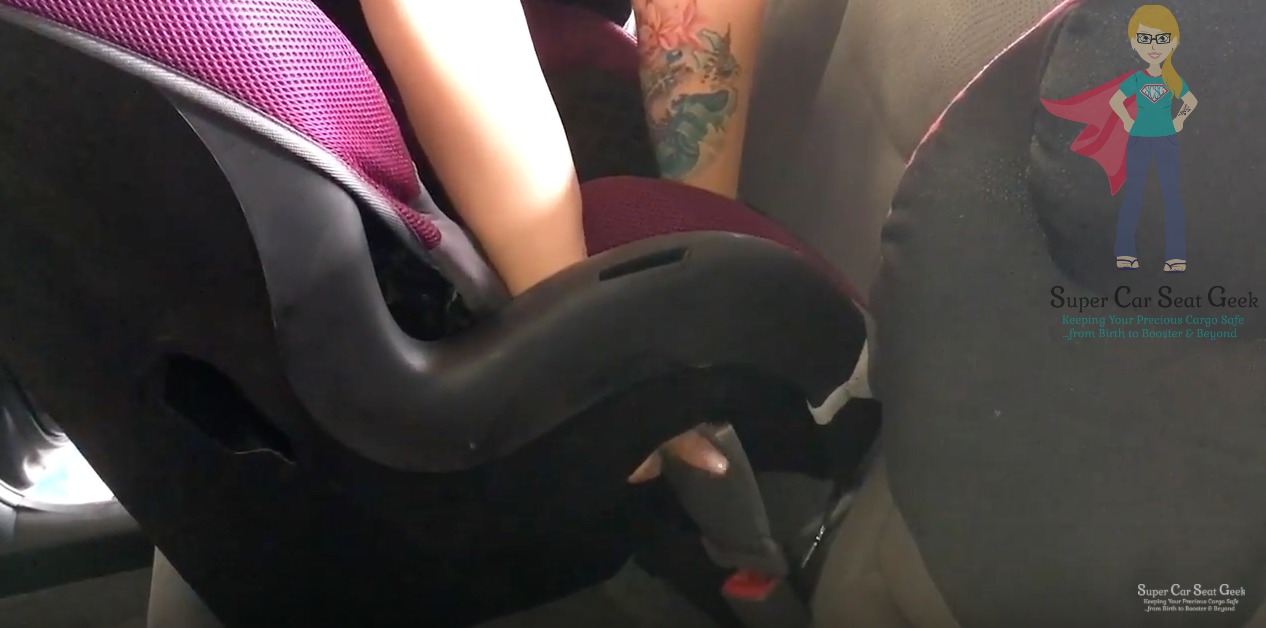
Accidental Unbuckling?


One of the most common complaints that I hear from caregivers is how much they struggle to get a tight car seat installation. Many caregivers feel as though they’re physically unable to do it, despite not necessarily having any physical limitations. Installing a car seat can feel intimidating and overwhelming. However, contrary to popular belief, getting the car seat installed correctly has very little to do with brute strength, and almost everything to do with leverage. While every car seat and vehicle is different – and have their own subtle nuances – I’m going to share some of my favorite tricks which work well for most configurations.
Since leverage is one of your biggest allies, you want to take full advantage of it. Most of the time that will mean that you want to pull the slack both toward you and parallel to the belt path of the car seat.

For example, if you’re installing a car seat using lower anchors (LATCH), you’ll want to look to see where the adjuster is on the lower anchor strap. It will be on the same side of the strap where the “tail” of the strap is located. Most of the time, I find that caregivers will grab ahold of the tail on the outside of the seat and try to tighten it by pulling it away from the car seat. While this seems perfectly logical, this does not utilize the available leverage very effectively. Instead, when possible, you’ll want to position yourself on the opposite side of the car seat that the adjuster piece is located on so that you can pull that “tail” toward you, parallel to the belt path of the car seat. For even better leverage, try pulling the strap inside of the car seat’s belt path and pulling from there. Many times this can be accomplished by pulling the cover of the car seat back at the belt path, and pulling the tail inside of the belt path. After the seat is installed tightly, simply replace and re-secure the cover.
Installing a car seat with a seat belt is very similar. You can often utilize the same method, but instead of pulling on the lower anchor strap’s “tail”, you’ll be pulling the vehicle shoulder belt toward you, over the car seat’s belt path, to better remove all of the slack from the lap belt portion of the seat belt. (Don’t forget to check your manuals for instructions on how to lock the seat belt.)
Remember to only check for movement directly at the applicable belt path on the car seat, and only by using about the same amount of force with which you would use to give somebody a firm handshake. If the car seat moves 1” or less directly at the appropriate belt path, then the car seat is installed tightly. If it’s moving more than that, then repeat the steps above.
Before you install your car seat, please be sure to consult your child safety seat’s owner’s manual for seat-specific installation instructions, as well as your vehicle owner’s manual for vehicle-specific installation instructions. And of course, don’t forget to schedule a seat check with a certified Child Passenger Safety Technician.
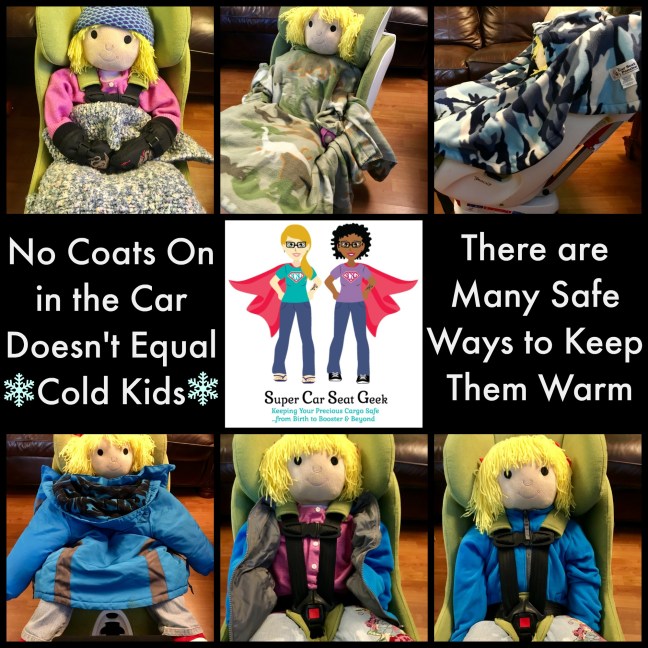
Wintertime, for many of us, means bitterly cold temperatures and biting winds. Packing on the thickest, warmest layers possible seems like the most logical thing to do, but did you know that bundling up under a car seat harness or seat belt can be dangerous?

When bulky layers are worn under a 5-point harness it leaves that passenger vulnerable to injuries in a crash (including being ejected from the safety seat itself!). The reason for this is that even when the harness is tightened over that thick coat (or bunting, or snowsuit, etc.), the jacket will compress in a sudden stop or crash, leaving enough slack in the harness that the safety seat may be unable to protect the child. While unpleasant to think about, it’s important to remember how extreme crash forces are. They’re violent enough that they can crush and tear through vehicle frames. A fluffy jacket or snowsuit wouldn’t stand a chance. But that does not mean that your family will have to suffer through frigid temperatures. There are many ways to stay warm safely while in the car.

Safely Layering Up
For young babies who haven’t yet developed full head control (typically, babies under 6 months of age or so), special care should always be taken to ensure that their head is not at risk for being pushed forward, and that their airway is not blocked or obscured in any way.
Dress your baby in a few thin, warm, snug-fitting layers and buckle them into their seat. Thin, fleece footie pajamas and the like can also be a good option, but snowsuits and buntings should not be used in a car seat. A lightweight, snug-fitting hat, warm mittens, and/or slippers can also be added. After baby is buckled up, several blankets can be tucked in place over the harness to keep them nice and cozy; I often recommend 1-2 lightweight blankets (flannel or cotton ones work nicely). If you’re able to, pre-warm your car to get the heat going.
If you’re using a rear facing only seat (commonly referred to as an infant carrier) and are buckling baby up before going outside, a few thicker blankets can be placed on top of thinner ones for extra warmth while carrying baby to and from the car.

A shower cap-style car seat cover is a low-risk option which can be especially useful on days where it’s precipitating or very windy outside. Conversely, the buntings and car seat covers which are designed to go inside of the car seat, behind the child should not be used. If you already have one, it can be altered so that most of their associated risks are mitigated (see below).
Remember! While it’s important to keep infants warm, they can overheat so once you’re in the car, layer accordingly.
*Please note: it is critically important to ensure that any blankets/covers, etc do not interfere with a rear facing only (infant carrier) from fully locking into its base!*

Some of the aforementioned options continue to be valid possibilities with toddlers, but there are additional ones which are worth mentioning (because who doesn’t like to have choices?!)
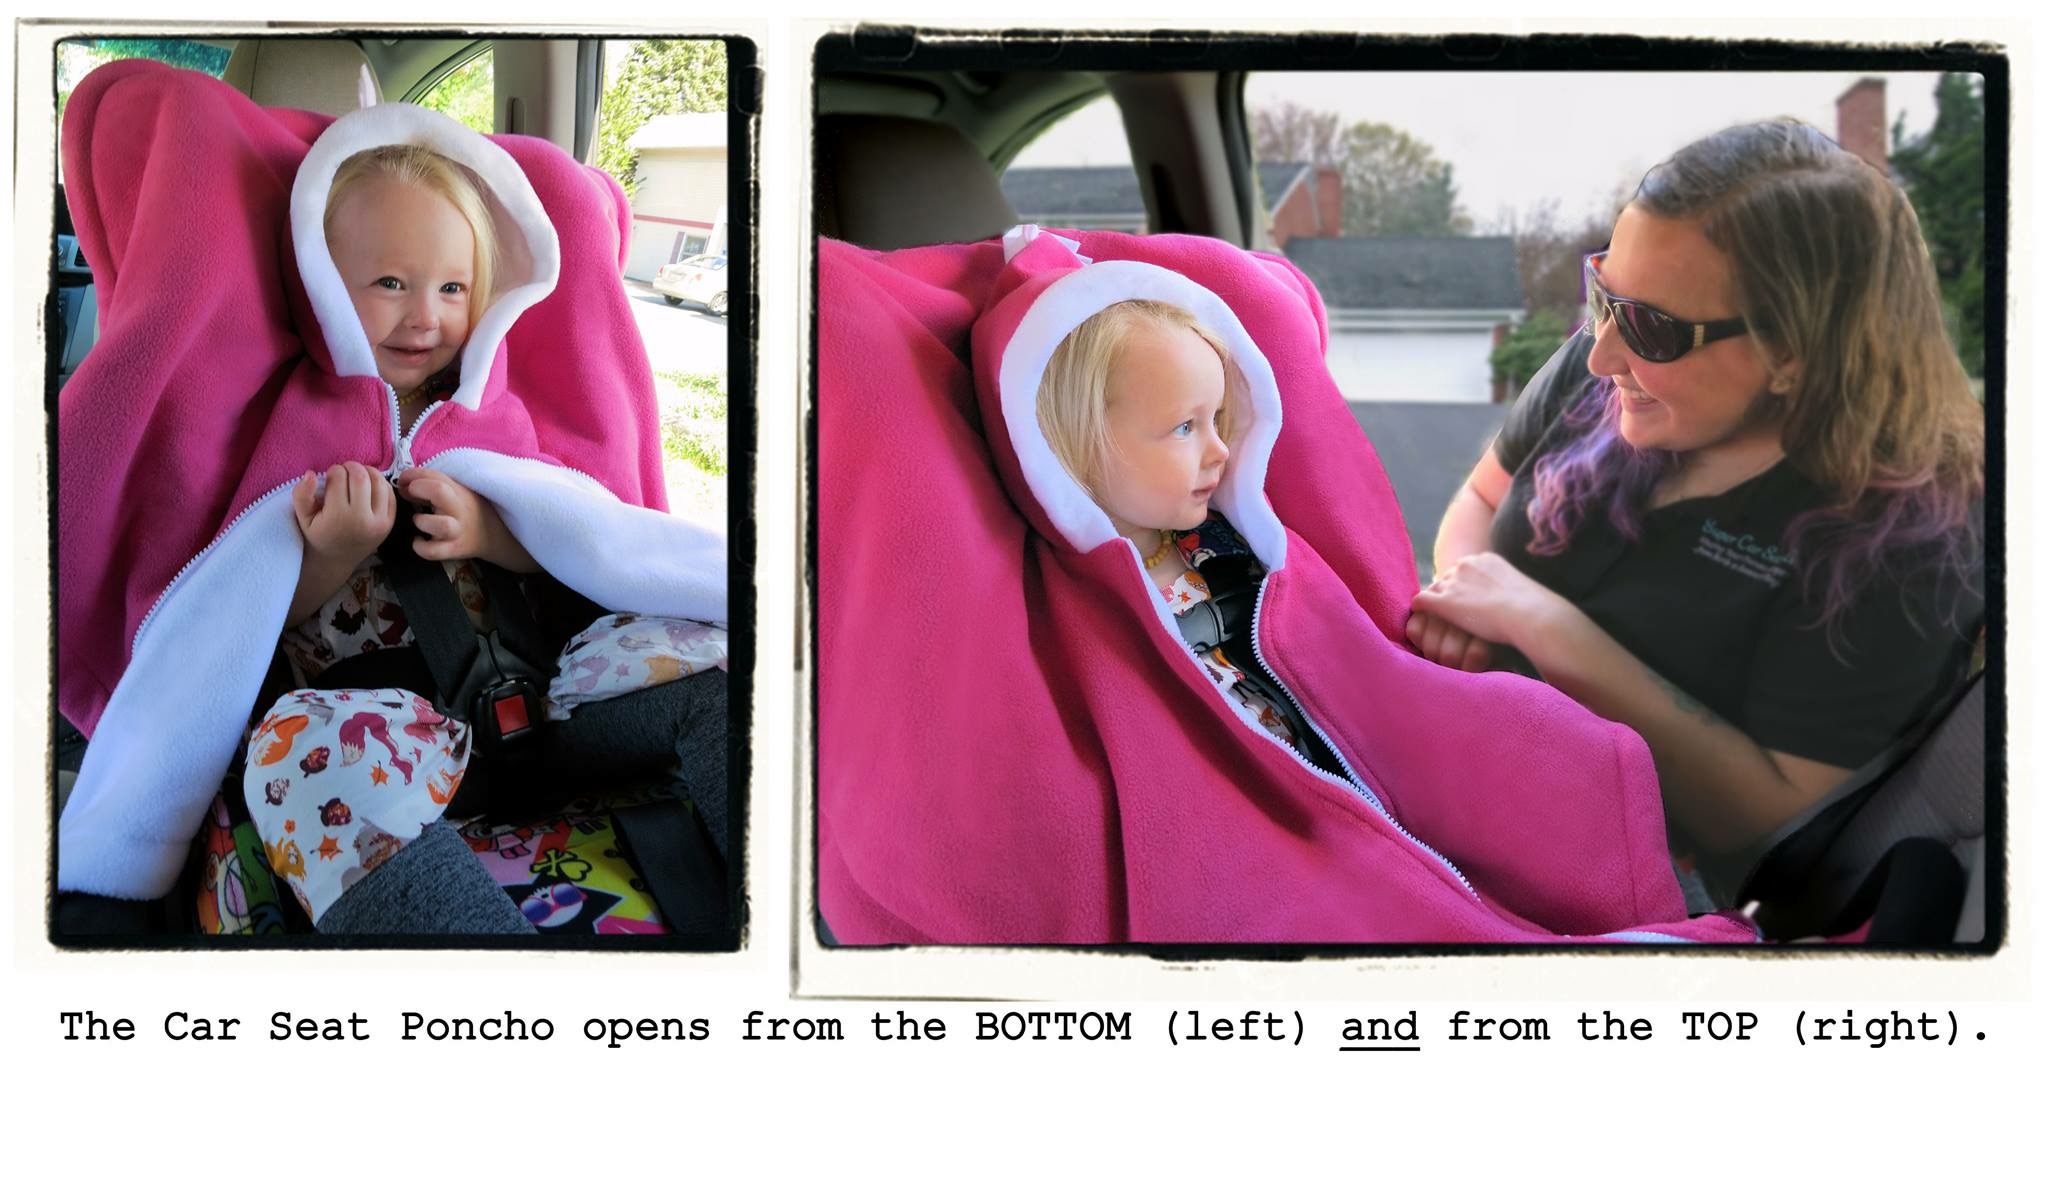
Ponchos
Chances are, I will always be partial to The Car Seat Poncho brand because these are the original “car seat ponchos” sold by the woman who designed and invented them! Their brilliant (reversible!) design features a zipper which can be unzipped from the top of the poncho by the child’s neck, as well as down by their legs. This makes buckling and unbuckling a breeze, and it means that you’ll never need to flip the poncho over their face/head to gain access to their harness. The back of the poncho simply gets draped over the top/back of the car seat while the front can stay over the child’s body. They’re even made right here in the U.S.A.
The Car Seat Poncho has generously offered Super Car Seat Geek readers a coupon for $3 off each poncho with coupon code: SUPERGEEK (offer expires 2/14/18)
There are, of course, many other brands and styles of ponchos available if you prefer. Similarly, if you already have one of those bag-style “Bundle” products, the bottom layer can be detached from the top layer and placed over the child like a wearable lap blanket! Pro tip: if you do this, I’d strongly recommend cutting off the large elastic band, as well as the Velcro around the “arm” openings.
Fleece Jacket

Dressing your child in a thin, single-layer, waist-length, form-fitting fleece jacket is one of my favorite tricks. They are often very inexpensive and surprisingly warm, especially when paired with a cozy hat and mittens! If your child would like to be extra toasty, simply tuck a warm, fuzzy blanket or two over them after they’re buckled up. The blanket(s) can easily be removed if your child starts to get too warm.
Packable Jacket
Another alternative to a thicker jacket is a down-filled, packable jacket. It should follow the same fit guidelines as described above. With any jacket worn in a car seat, I recommend doing the following “test” to check if it’s a safe choice to wear in the seat:

1) Buckle the child in the car seat without their jacket on & tighten the harness so that it passes the “pinch test”.
2) Remove the child from the seat without loosening the harness.
3) Put their jacket on, and place them back into the car seat.
4) Buckle them back up.
If you’re able to buckle them up again without having to loosen the harness, or only having to loosen it a very small amount, then the jacket is ok to wear in the seat. If the harness had to be loosened more significantly, then it is not a safe option.

Wearable Blanket
A “wearable blanket” can be used by your child after they’re secured in their seat. Like a regular blanket or a poncho, it would go over the harness and drape over the sides of the car seat. This is an especially nice option for older children because it’s usually long enough to cover the child from their neck down to their feet. Additionally, the sleeves permit the child use of his/her arms and hands while still having them covered. If the child gets too warm it’s easily removed.
The ideas listed above are still perfectly fine to utilize as time goes on. However, once kids start going to school, a very warm jacket is often needed for outdoor-time. Sometimes it just makes more sense to have a traditional, thick winter jacket. While those will continue to be unsafe to wear under a safety restraint, the child can wear it out to the car and remove it prior to buckling up. The jacket can then be put on backwards, over their harness.
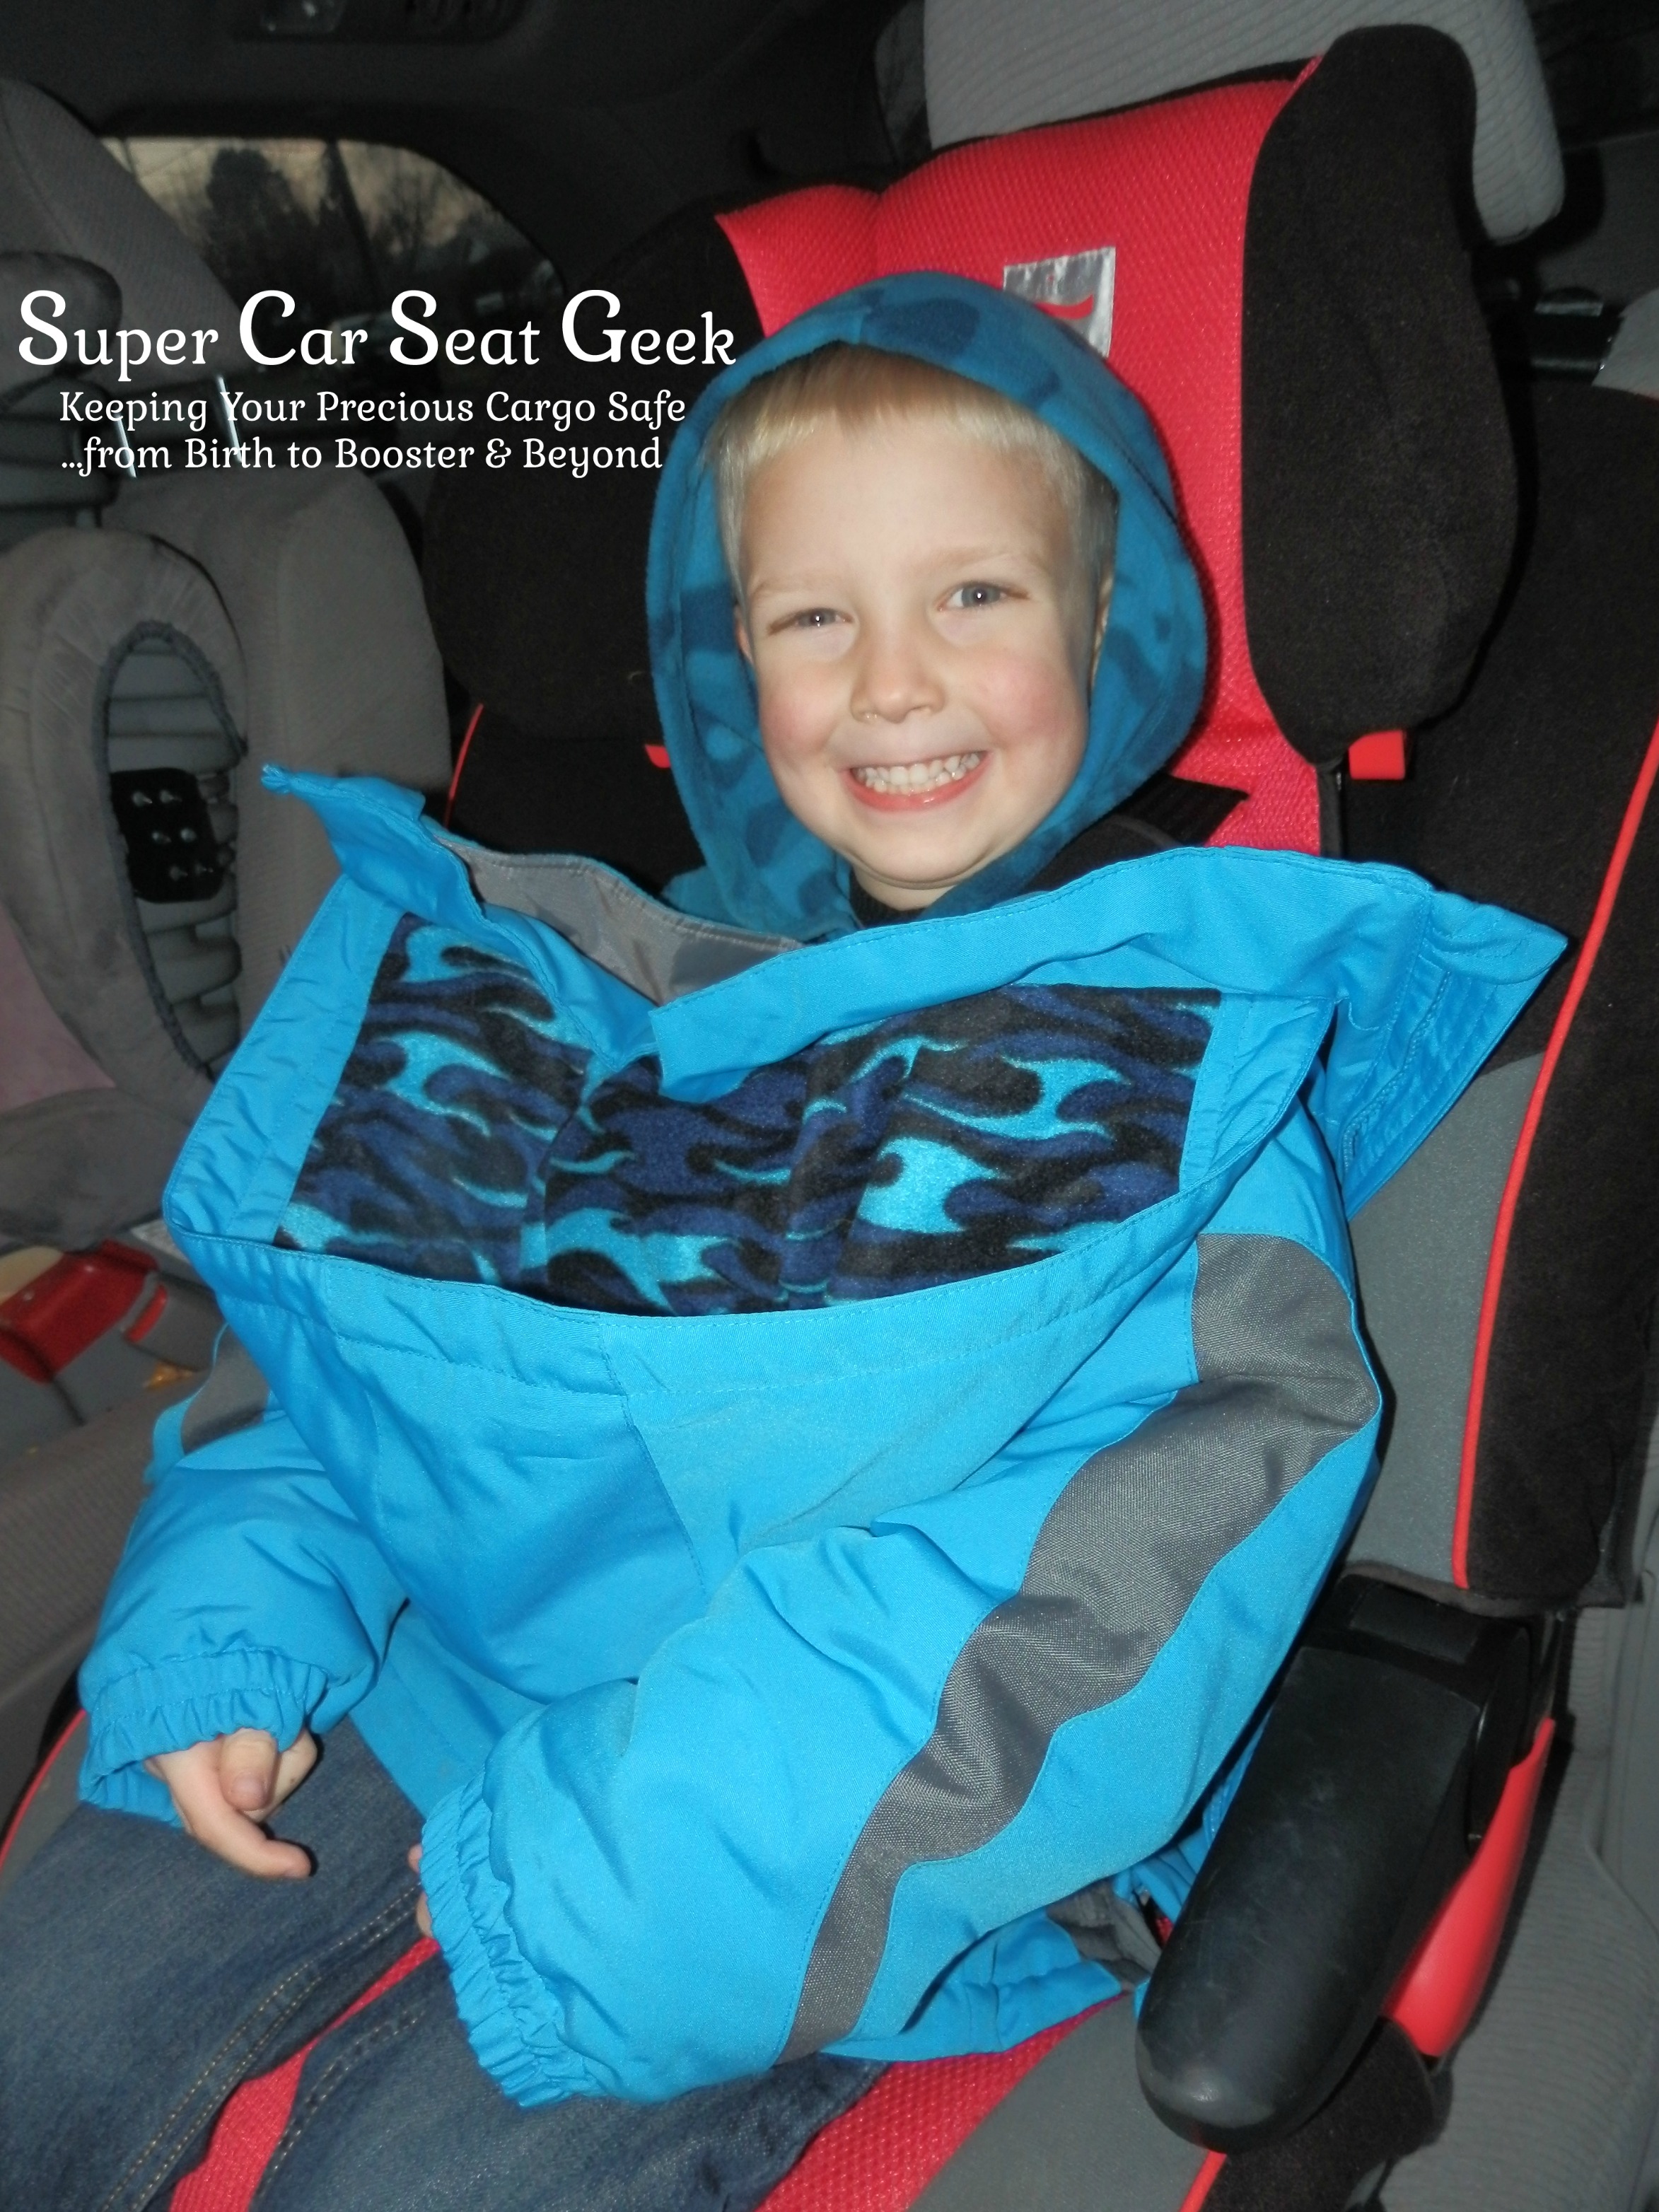
Another trick is to unzip a jacket and pull it to the sides of the harness. The jacket can be zipped up over the fastened harness if the child desires, or left unzipped. Note: this is best done with thinner jackets to avoid bulky or compressible fluff behind the child.

While the “no coats in the car” rule is starting to become more mainstream, few caregivers realize that coats continue to pose safety risks after children transition to a booster seat from their 5-point harness.
Yes, a seat belt can go back and forth to tighten and loosen as needed, and it will lock and tighten in the event of a sudden stop or crash. However, in order for a seat belt to provide optimal protection, it must be contacting the person’s body, not a fluffy jacket. When the latter is the case, the passenger is at increased risk for injuries since the seat belt must fully compress the jacket prior to making contact with the occupant’s body.

Jackets should continue to be thin and lightweight, and should not interfere with the seat belt. The seat belt should make direct contact with the occupant’s lap, and the shoulder belt should lie flat on the occupant’s torso and shoulder. If a thicker jacket is worn in the car, unzipping it and pulling it to the sides of the seat belt will mitigate many of the risks.
Car seats and seat belts need to be tight in order to protect their passenger. Bulky clothing can make them too loose even if they feel tight. Whether you choose to purchase a specialized product, or utilize what you already have on hand, there are a plethora of safe options available to keep the whole family safe and snug all winter long!

Kids sure have a way of sprouting up overnight at times, don’t they? Sometimes it can happen so quickly that we don’t even realize how much they’ve grown until we happen to catch a glimpse of them a certain way. Just like clothing sizes need to be adjusted as a child grows, a child’s car seat also needs to be adjusted in various ways to accommodate their growth.
Every car seat is different, and each one has different rules when it comes to adjusting the harness, the buckle, removing inserts, etc so it’s critical to review your manual periodically. This article will specifically address how and when to adjust the height of the harness.
The vast majority of car seat harnesses will adjust for height in one of two ways.—They’ll either have a “traditional rethread” harness, or they’ll have a “no rethread harness”. Again, please review your manual for your specific seat.
Traditional Rethread Harness: Car seats with this style harness will have various slots in the shell (frame) of the car seat which the harness is threaded through, and a metal piece called a splitter plate to which the harness is secured. The splitter plate is attached to one end of the harness adjuster “tail”, which comes through the bottom, front of the car seat and is what is pulled on to tighten the child’s harness.

To decipher where the harness should be, one needs to look at where the child’s shoulders are in reference to the harness slots, and take into account whether the child is rear facing or forward facing. (Remember: Any time that a child is rear facing, the harness must be level with, or below the child’s shoulders; when they’re forward facing, the harness needs to be level with or above the child’s shoulders. Additionally, some car seats have restrictions on which harness slots may be used for each direction so again, it’s critical that you refer to the owner’s manual for the seat.)
Often the easiest way to adjust the height of the harness is to uninstall the car seat, loosen the harness a bit, and turn the car seat over so that you’re looking at the back of it. Slide one side of the harness off of the splitter plate and pull the strap through the front of the car seat. Ensure that there are no twists in the strap and then route the harness strap through the appropriate slot, taking care to place it through the same layer of fabric/padding as the shell of the car seat. Fully re-attach the harness strap to the splitter plate as specified in the manual. Repeat for the other strap, ensuring that both straps are at the same height. After the seat is re-installed, double check that the harness is now at the appropriate height for the child. If you’re unsure if it’s at the correct height, a helpful tip is to place a butter knife or popsicle stick on the child’s shoulders and see where the tip is in relation to the harness slots.

Pro Tip: The harness should always be at the closest slot to the child’s shoulders which is also appropriate for the direction in which they face.
No Rethread Harness: Car seats with this type of harness often adjust by squeezing a handle at the top of the head rest, and pulling the headrest up/pushing the headrest down. As the headrest height changes, so does the harness height. Frequently, this type of harness can be adjusted without having to uninstall the car seat.

Sometimes it can be difficult to gauge exactly where the harness is in relation to the child’s shoulders. Since this style car seat doesn’t have harness slots, the “popsicle stick test” described above isn’t as useful. Instead, what I often advise caregivers to look for is how the harness looks on the shoulders themselves.—Is the harness curving over/around the shoulders (which is what we’d look for when a child is rear facing), or is it angling upward by the child’s shoulders (which is what we’d look for when a child is forward facing)?
After the harness is adjusted to the appropriate height, the caregiver should ensure that the head rest is locked into place so that it’s not “between” adjustment settings.
These are only two examples out of many. The car seat which you have may adjust in a different way altogether. The car seat manual will always explain how and when to make adjustments. If further clarification is needed, caregivers can contact the car seat manufacturer directly. Meeting with a certified Child Passenger Safety Technician is the best way to ensure that your child’s seat is not only adjusted correctly, but installed correctly as well. You can schedule an appointment with Super Car Seat Geek via Facebook, email, or the “Contact Us” portion of the website.

The responsibilities that come with parenthood can be overwhelming at times. There are so many different things to learn and frequently, when you feel like you’ve finally mastered one thing, something changes, and you need to re-learn it.
Protecting your child in the car is one of the many things that we parents must learn how to do. Most of us get in and out of the car multiple times a day. It is a mundane task, so we take it for granted, forgetting that there are inherent risks in and around the car. Parents today have busy lives and countless things to do and remember. We are usually running around, trying desperately to get from Point A to Point B safely and on time. It’s easy to forget the many risks we face each time we climb into the car. The fact however, remains that car crashes are the leading cause of death for children in the U.S. Most parents feel like their child is in the correct car seat and that their car seat is installed and used correctly, but one study has shown a misuse rate of as high as 92%¹.
While I certainly can’t cover everything there is to know about child passenger safety in one brief article, I’m going to share some basic tips which are easy to implement right now. Please contact me if you have further questions or would like to schedule an appointment to have your child’s car seat or booster checked.
1) Harness Placement
When a child is rear facing, the harness (car seat straps) should be coming out of the car seat directly at, or below the child’s shoulders. (Remember, a child should be rear facing until they are at least two years old.)
When a child is forward facing, the harness should be coming from at or above a child’s shoulders. (Remember, a child should be harnessed until they are at least five years old.)
2) Pinch Test
Ensure that the harness is flat and straight, with no twists , and then remove all of the slack . Pay special attention to ensure that there’s no slack “hiding” down by the child’s hips. The harness will be snug enough when it passes “the pinch test,” meaning that you’re unable to pinch a fold in the harness at the child’s shoulders/collarbone.
3) Chest Clip Placement
The harness retainer clip (more commonly referred to as the chest clip) should always be directly on top of the child’s sternum (breast bone). The top of it should be aligned with the child’s armpits.
4) Inch Test
The proper way check that the car seat is installed tightly, is is to grab the seat directly, and only at the belt path, and give it a wiggle with about the same force as you’d use in a firm handshake. The car seat should not move more than 1” in any direction at the belt path. (If the seat is installed rear facing, the belt path will be under the child’s feet/lower legs. If the car seat is installed forward facing, the belt path will be behind the child’s back.) Remember—if the car seat is forward facing, you’ll also want to secure the tether strap to the designated tether anchor for that seating position, and remove all of the slack from the tether strap.
5) Read Your Manuals
Your child’s safety seat can’t do its job if it’s not used correctly. Every car seat will have different rules for how and when to make adjustments to the harness, buckle, padding, etc. The manual will tell you precisely how to install the safety seat depending on the vehicle, the location in the vehicle the weight of the child. It is critical to read the manual for your child’s seat as well as the child safety seat section in your vehicle’s manual. I strongly recommend re-reading your manual periodically, especially when you need to uninstall, clean, make adjustments or reinstall the seat. If you’re confused about something, you can reach out to a Child Passenger Safety Technician (CPST) such as myself for clarification, or to the car seat manufacturer.
While there are many things to be aware of and to learn, my job as a CPST is to help you keep your child safe. Nothing makes me happier than helping caregivers feel empowered in their abilities to do that. I offer a variety of services to assist in every aspect of this journey. Super Car Seat Geek’s exclusive Concierge Service will help pair you with the very best car seat options for your particular child, vehicle and budget. Since the right seat is only a fraction of the equation, a private Car Seat Check will ensure that you understand how to install and use your child’s seat correctly every time they get buckled up.
If you have questions or would like to set up a Concierge Service session, or a private Seat Check, please contact me at facebook.com/SuperCarSeatGeek or email me at SuperCarSeatGeek@gmail.com

A Guest Post by Ashley Weed Harnisch
Awareness around in-flight safety is ever-increasing thanks to the diligent work of both child passenger and air safety advocacy groups. The FAA1, AAP2, and the NTSB3 all recommend 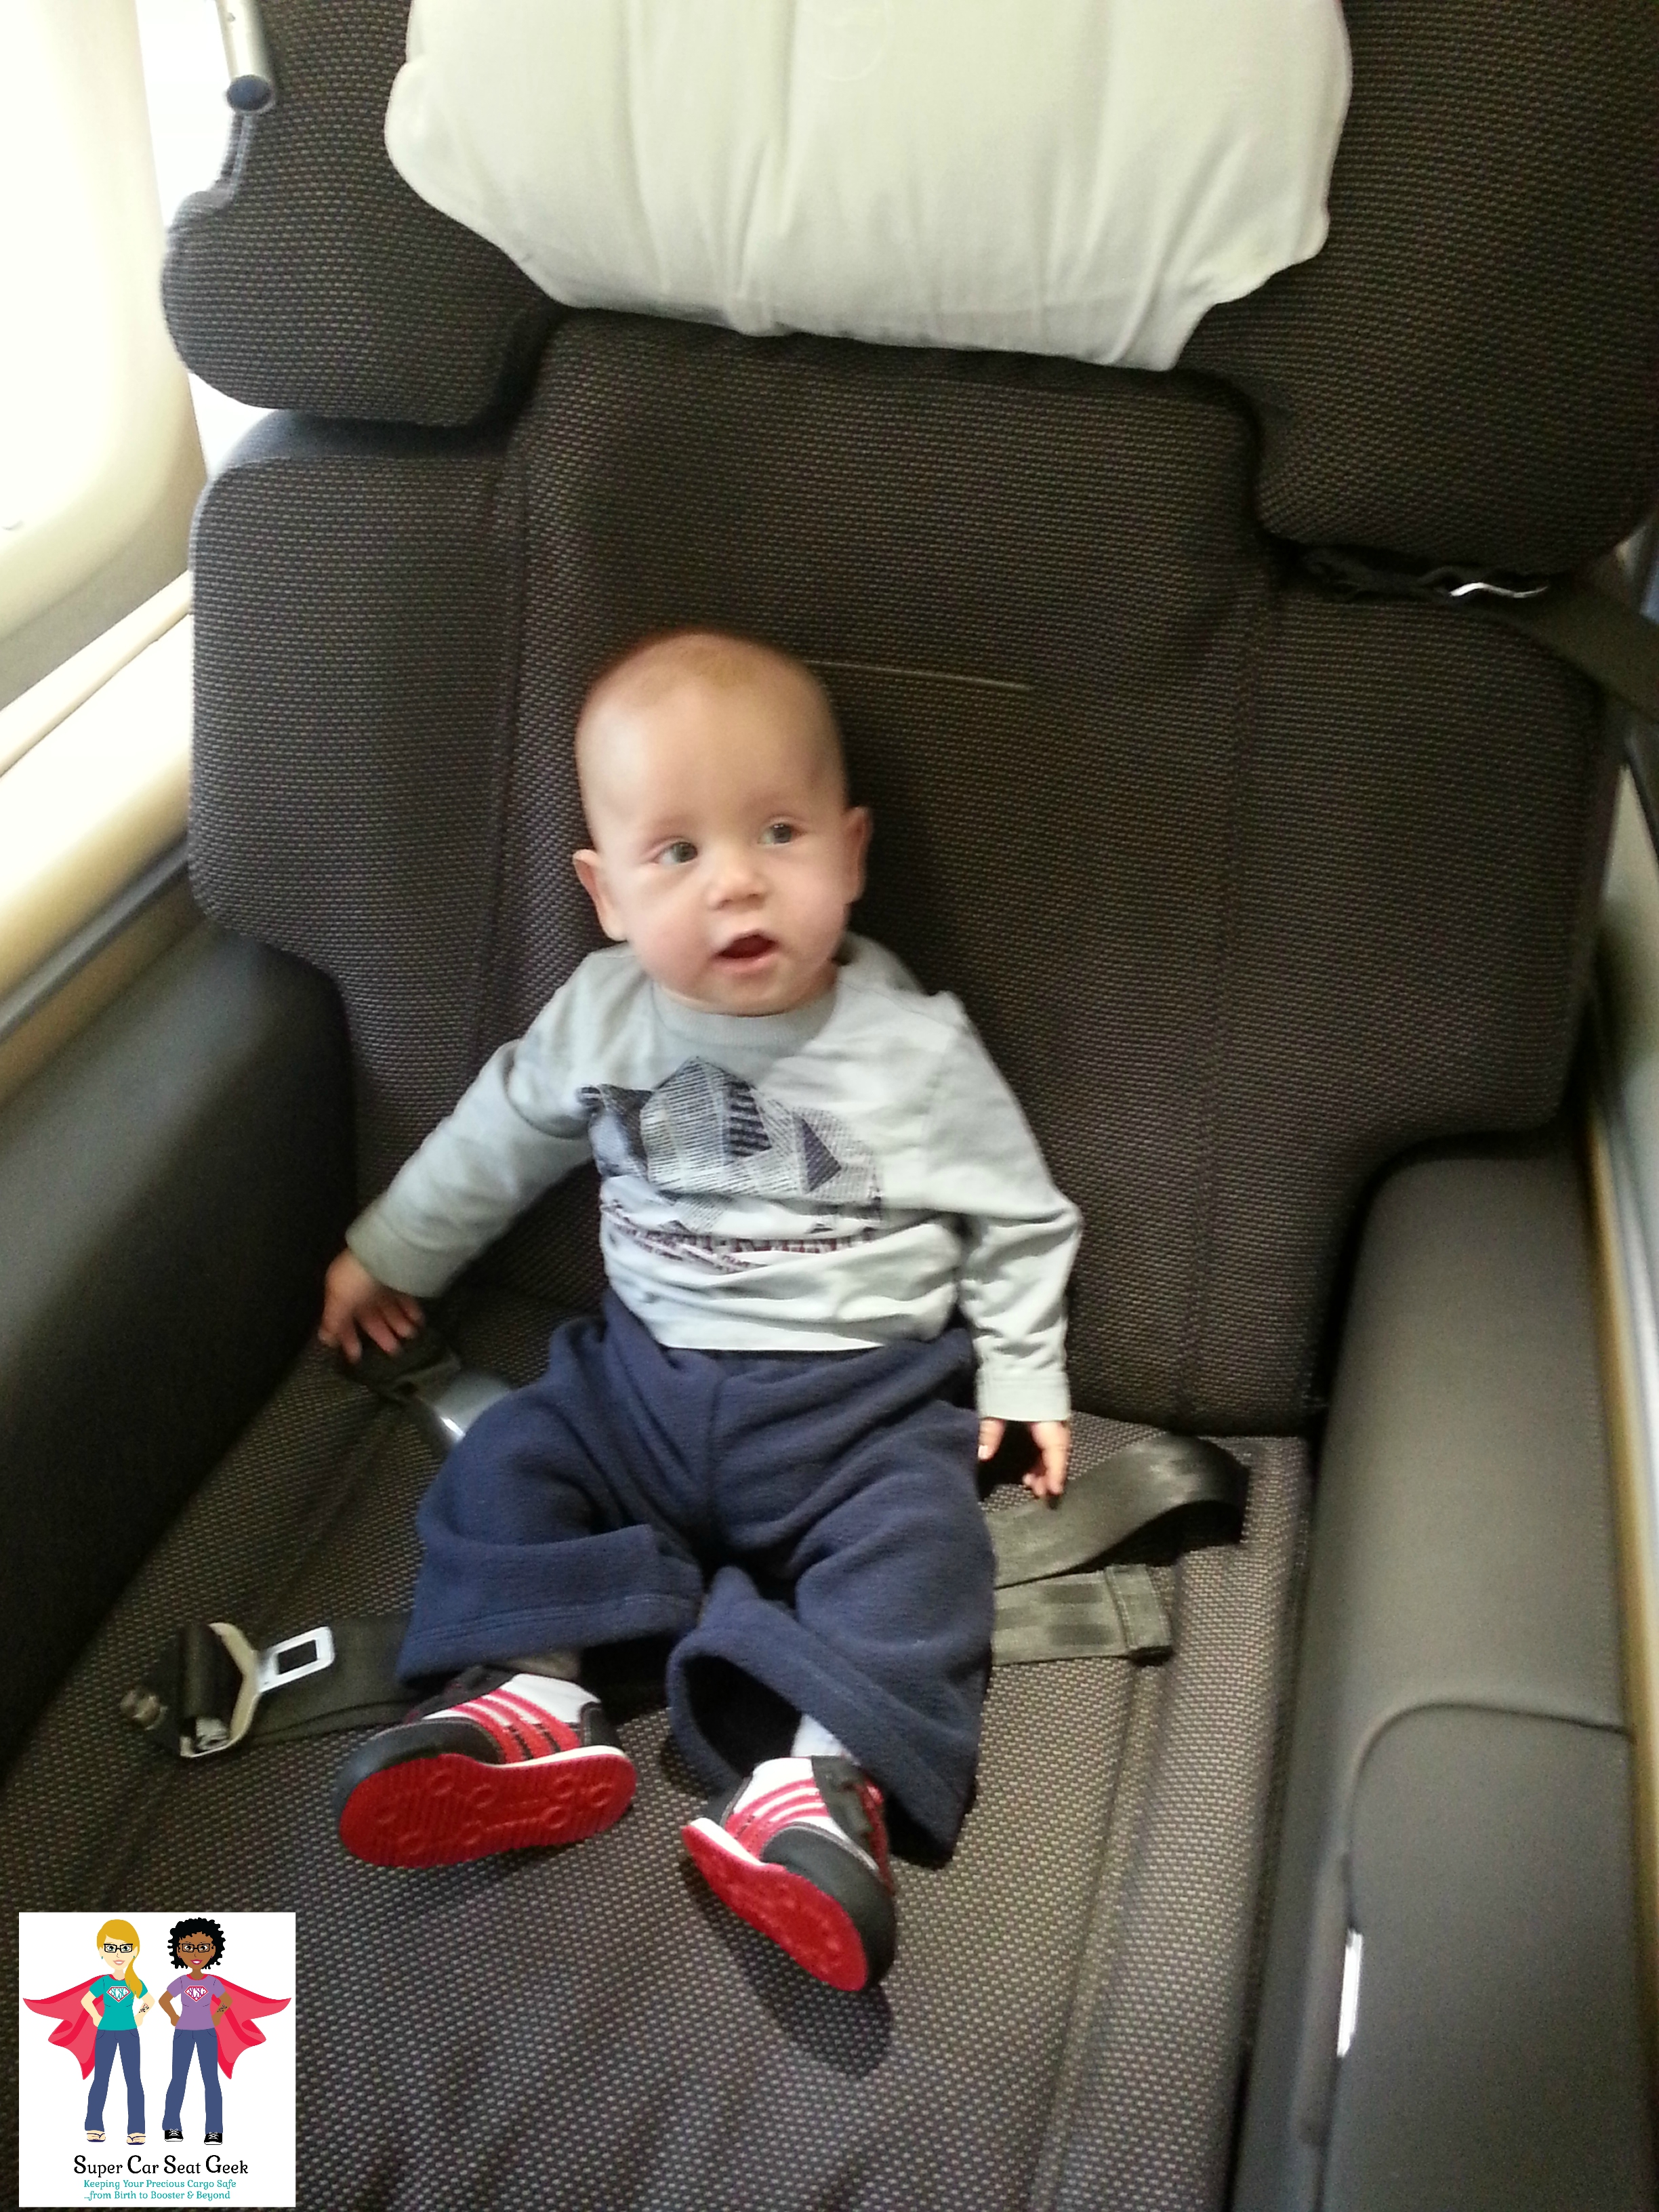 that children need to be appropriately restrained on an airplane. The Bureau of Aircraft Accidents Archives (B3A)4 allows us to see that aircraft incidents happen far more frequently than the media leads us to believe. An appropriate child safety seat eliminates the risk of your child being ripped from your grasp without warning during severe turbulence5, severe crosswinds6, runway accidents7, and even survivable crashes8. For a child under 40lbs and/or a child who is not mature enough to stay correctly seated with the airplane lap belt – the only option at this time is a FAA approved child restraint (i.e. car seat). Even after a child meets the minimum weight and maturity requirements to be safely restrained by the airplane lap belt, it is prudent to utilize their FAA approved car seat in-flight to eliminate the risk of damage from checking9, misrouting, or a total loss of the car seat! Two great sources already exist to provide you more detailed information on why a FAA approved car seat should be used on an aircraft10, and recommend car seats that often meet the needs for traveling11.
Note: The CARES Airplane Safety Harness12 is currently the only child restraint device approved by the FAA other than car seats. It should be noted, however, that CARES utilizes the airplane lap belt to restrain a child. This provides a very small window of opportunity for appropriate use as the airplane lap belt does not appropriately fit a child until they are approximately 40lbs.
A common misconception is that car seats are too large, too bulky, or too heavy to transport around an airport. To reduce the frustration for those traveling with children, child passenger safety experts often recommend traveling with a lightweight seat. What happens when your child outgrows the frequently recommended lightweight car seats!? As a frequent flyer, I’m here to debunk the naysayers with tips and tricks on traveling with some of the longest lasting (extended rear-facing) seats on the market! Even a task as difficult as clearing immigrations and traversing two terminals in 15 minutes is possible with the proper tools. (Ask me how I know!)
When choosing a car seat for travel, there are two key items that I consider and weight is not one of them:
Ease of install: Installing a car seat for the first time in a vehicle you are not familiar with is difficult enough. Add in the fact that you have just walked off of a red-eye flight and you will be cursing like a drunken sailor in no time! One minute oversight when installing a car seat could prove to be catastrophic. I find it
less nerve-wracking to travel with the car seat that we use on a daily basis, which allows me to be accustomed to all of its intricacies. Two items that are always readily available in my bag to assist with various installs are a locking clip13 and a tether connector strap (also known as a d-ring, used to create a rear facing tether point specific to seats that allow rear face tethering)14 since there is such a wide array of install possibilities across vehicles and countries.
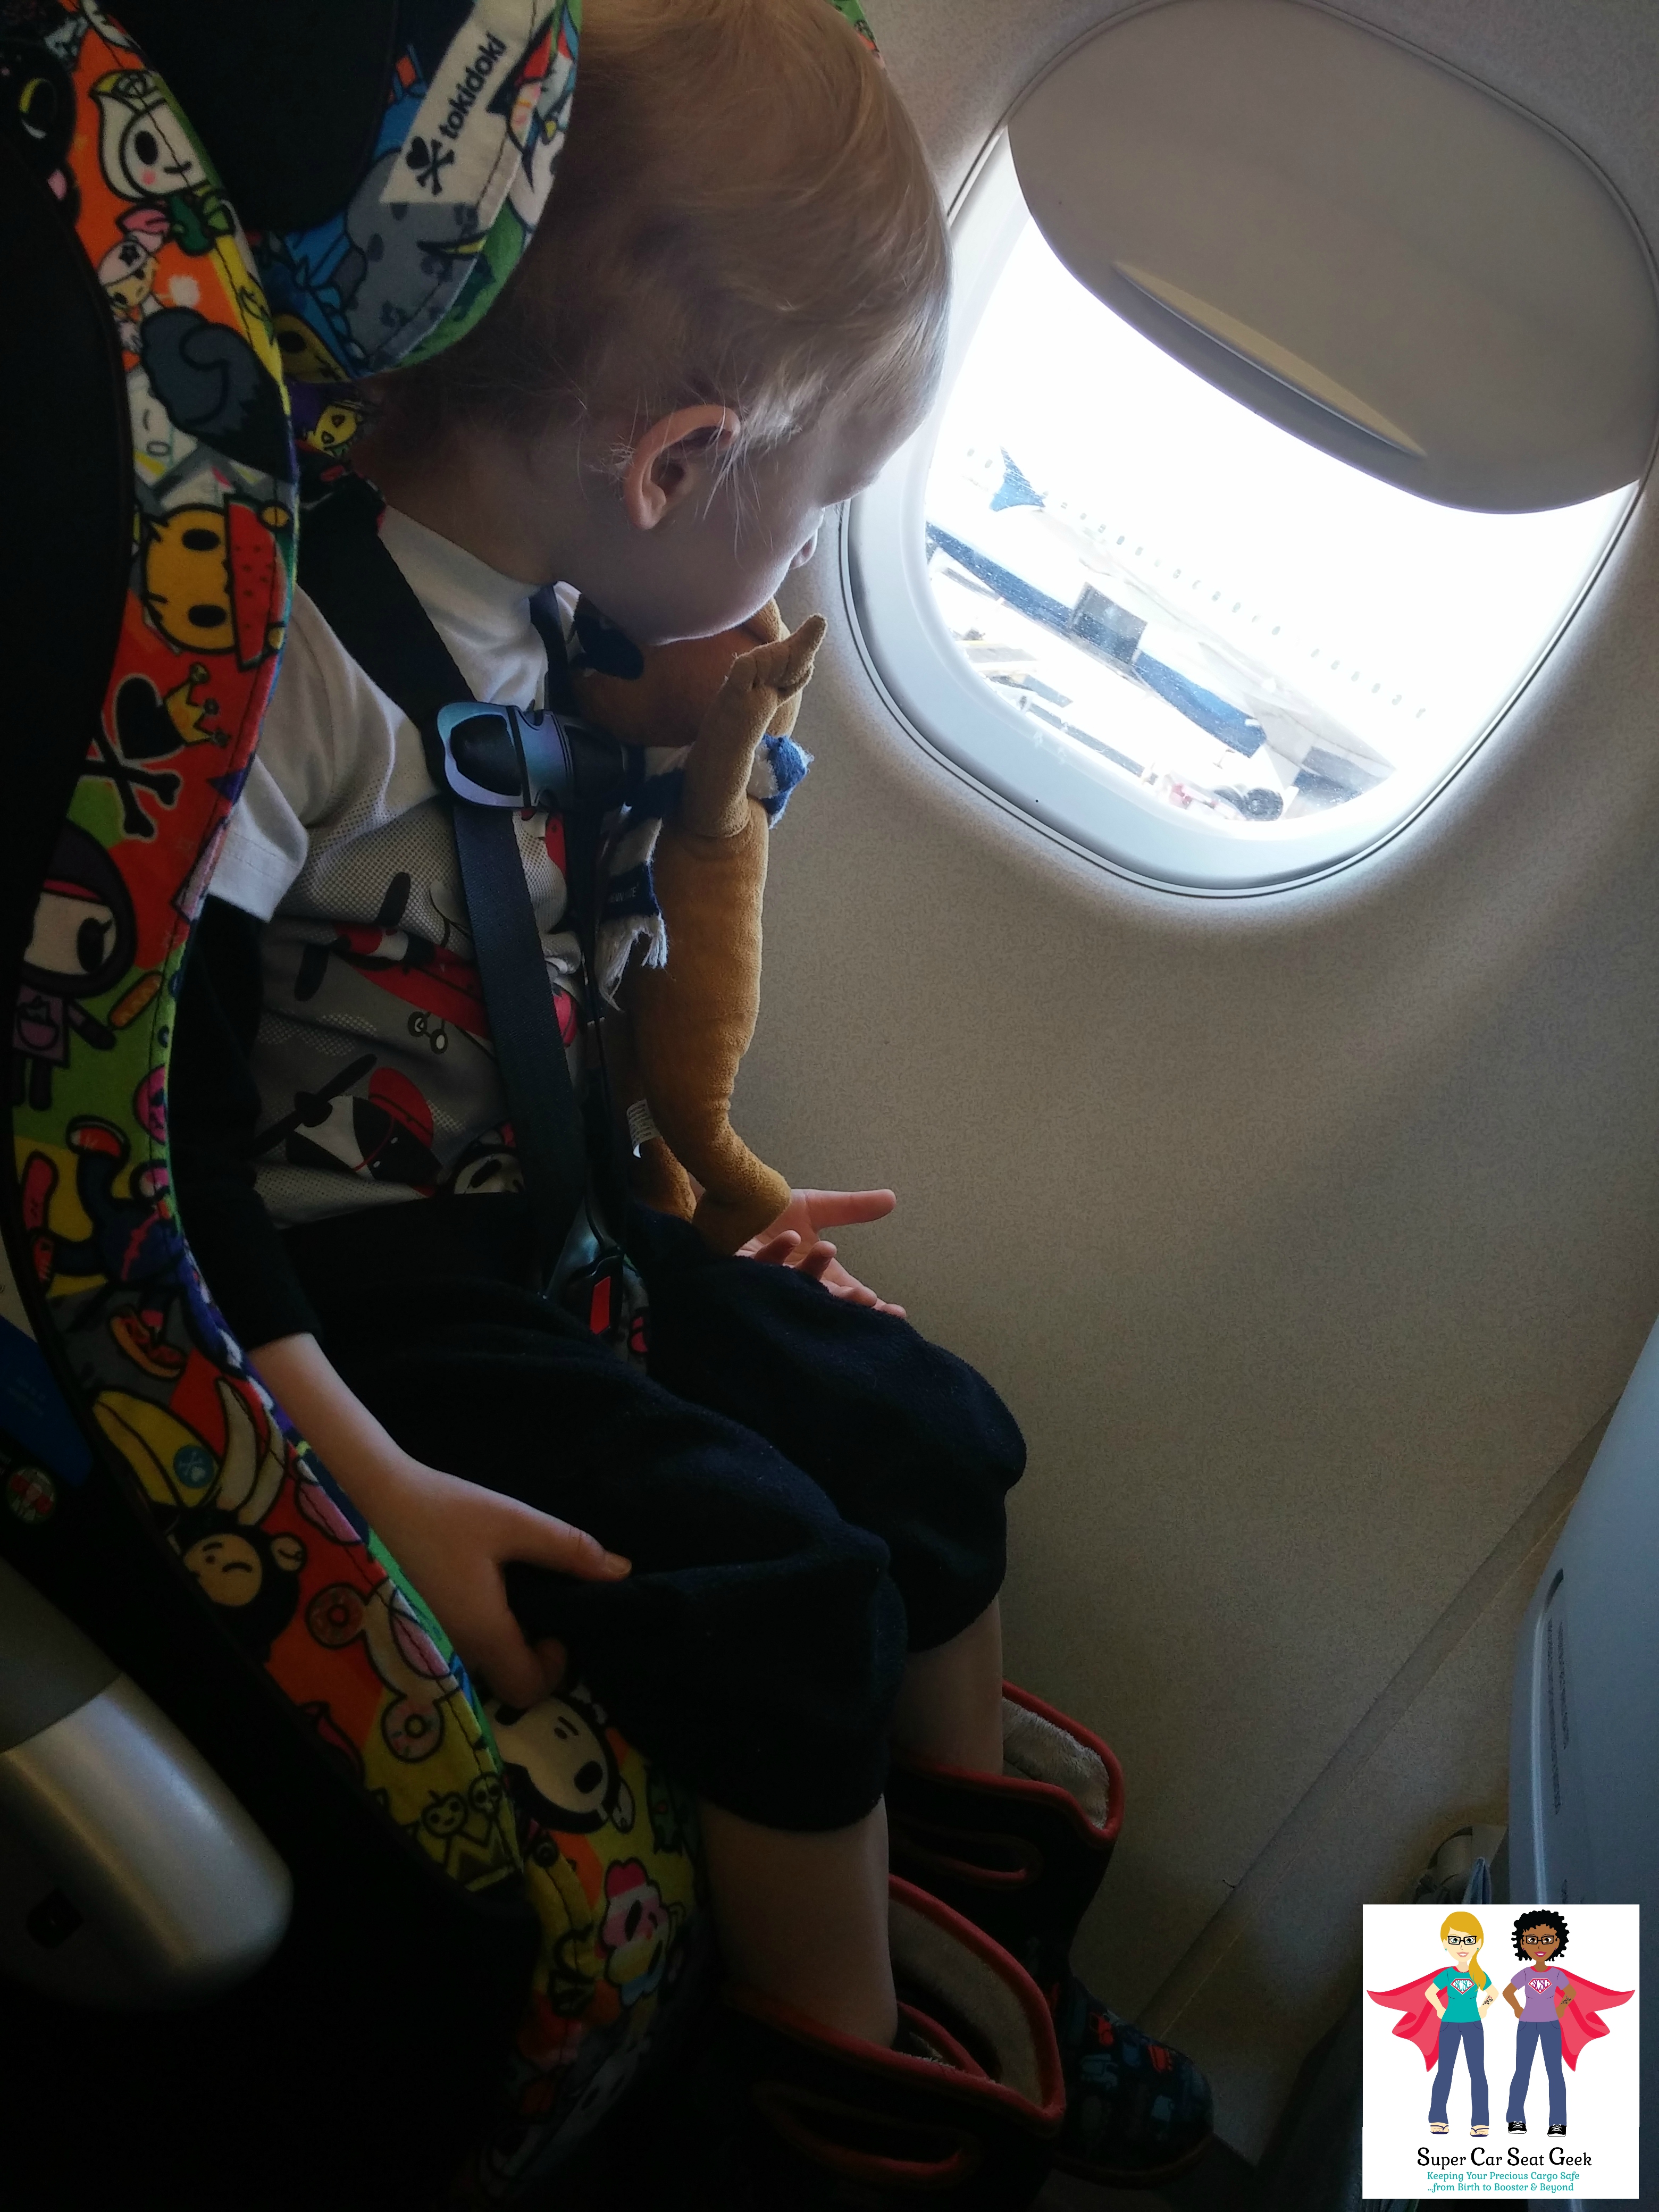
Fit on aircraft: While no FAA approved car seat should ever be incompatible with aircraft, many seats prove to be a very tight fit when used rear-facing, require the armrest to remain up, or must be carried down the aisle of the aircraft above the airplane seats. While taking the time to carry the car seat down the aisle may seem negligible, imagine how much time is consumed if you were to do that 20+ times each year; 50 rows can be a long and tedious walk! How would you manage any other items going in-cabin with you during that time? Don’t forget about your little one either! As a frequent flyer, it was quintessential that we travel with a car seat that minimizes the door-to-door hassle by seamlessly fitting down the aircraft aisle.
This brings me to two seats that get a big “Gold Star” from a Mama who spends almost as much time looking down at the clouds as I do looking up at them! These two companies are both leaders in extended rear-facing seats, but most importantly they make some of the narrowest profile seats on the market, which allows for the car seat to be maneuvered down the aircraft aisle with minimal effort.
A big thumbs-up goes out to the engineers at Clek. Their tidy and sleek design makes my heart melt. Their minimalist design is number one on my list of features unique to the Clek convertibles that may often be overlooked by someone who is new to travel.
Tidiness: Every part of the car seat – from the LATCH belt and tether to the manual – has a special little cove! The built-in lock-offs allow for a quick and easy install across a wide variety of vehicles. The Clek Fllo conveniently has a fold-under rear-facing recline foot that reduces the number of items you need to keep track of when traveling and the optional anti-rebound bar can be placed within the harness the same way your car seat arrived from the factory or left at home for safe keeping. Clek also offers several fun designs from Tokidoki and Paul Frank to keep your little one excited and intrigued with their car seat – even at 30,000 feet above the ground!

Narrow profile: The compatibility of Clek’s narrow profile convertibles and the Go-Go Babyz Travelmate16allows for effortless travel (the Go-Go Babyz Mini Travelmate is another compatible option) . One of the most difficult components to travel with little ones is the final phase from the gate to your seat. This combination allows you to not only maneuver the car seat with ease throughout the airport, but also conveniently lets you roll your car seat straight to your assigned seat. With two quick motions the Travelmate folds compact for easy stowing in the overhead bin.
Pro Tip: When arriving at the x-ray belt, you should see a small passageway either to the left or the right of the x-ray machine. You can park your Clek – attached to the Travelmate – at this passageway and then proceed through the x-ray machine as directed. Security personnel will promptly retrieve the items and maneuver them past the x-ray machine for a hand screening. When in doubt, a pleasant “Hello Ma’am/Sir, my child’s safety restraint is too large to pass through the x-ray machine. Where would you like me to position it for a hand screening?” should suffice and get you quickly back on your way to the gate.

Anti-Rebound Technologies: Unlike the Foonf, Clek’s Fllo can be installed in a rear-facing position without the use of the Anti-Rebound Bar (ARB). With the continuous reduction of economy class seat space, every inch of space is valuable and can often be the difference in achieving a proper car seat install. The Fllo’s advantage extends to installing the car seat in a vehicle once you have reached your destination.

Note: Clek convertible car seats conveniently allow for the use of either the ARB or a rear-facing tether when installing in a vehicle that provides dedicated rear-facing tether points. In the US, vehicles typically restrict the use of a Swedish style rear-facing tether (for the select few car seats which allow for rear face tethering), but the practice is more common in other countries. Clek also prohibits the Fllo from overhanging the vehicle seat, so the ability to remove the ARB is often necessary for a proper install in some vehicles.
Diono Radian17
The Diono Radians get an A+ for ingenuity. There are three features unique to the Diono Radians that may often be overlooked by someone who is new to travel:

Fold flat design: The Diono Radians have a convenient fold flat design. Not only does this allow the car seat to be carried like a backpack, but the car seat also fits on the airport security x-ray belt with ease. The Diono Radians can be carried on your back with carry straps18, or with Diono’s Car Seat Travel Bag19 which also conveniently holds the car seat’s rear-facing boot and the angle adjuster20 that is likely needed for any aircraft install and is also available for purchase separately. I highly recommend Diono’s travel bag if you are traveling with one of their car seats as it also keeps the LATCH straps and tether tidy while you chase your little one across the terminal – or make a mad dash for a connecting flight!

Bracing: While not an important factor to the majority of consumers in the US due to vehicle manufacturers prohibiting this practice, the Diono Radians do permit bracing.
This allows you to safely utilize the seat in a rear-facing position on even some of the tightest aircraft installs. Additionally, outside of the US, it is the norm rather than the exception for vehicle manufacturers to permit bracing of car seats. Vehicles outside of the US are often more compact and the ability to brace a rear-facing seat like the Diono convertibles can save you from playing vehicle roulette in the rental car parking lot. Unfortunately, this seat does not have a built-in lockoff so if you are traveling outside of the U.S. you may need to use the aforementioned locking clip since most vehicles outside the U.S. do not have locking seat belts, and ISOfix/LATCH may be unavailable.

Low profile: I’m convinced that one of Diono’s engineers is a frequent flyer and said “wouldn’t it be a dream if my child could appropriately use the tray table in flight”!? Diono’s low profile seats are often touted for ease of vehicle use when placing a child in the seat; however, this low profile design makes the Diono convertibles a dream during in-flight use with a child who is utilizing the seat in a forward-facing position.
Regardless of the child restraint device you choose to take with you on your next adventure, always consult the manual and know ahead of time where the FAA sticker is on your car seat. Reaching out to a CPST or the car seat manufacturer may prove to be invaluable to you as some seats have features or quirks (e.g. seat belt extender, reclining aircraft seatback then raising it back up after installing, leaving aircraft armrest up, etc.) that need to be accommodated when traveling. If you do not already own one of these two extended rear-facing seats, or if they are out of your budget for purchasing a narrow profile travel seat – never fear! Several budget-friendly and lightweight travel seats are available to choose from as well. Depending on the age, weight, and height of your child, the Cosco Scenera NEXT21, Safety 1st Guide6522, Combi Coccoro, Evenflo SureRide DLX 6523 or Evenflo Sonus or Stratos may all be great options for you. For a child over the age of 2, who is forward facing, the Graco Tranzitions, Harmony Defender 360, Cosco Finale or Evenflo Maestro may be worth considering. Feel free to consult my friends at Super Car Seat Geek24 to see which seat would be a good choice for your situation. The most important thing is to do is to travel safely and make lots of wonderful memories!

FAA1 http://www.faa.gov/passengers/fly_children/
AAP2 http://pediatrics.aappublications.org/content/108/5/1218.full
NTSB3 http://www.ntsb.gov/news/2010/101215.html
Bureau of Aircraft Accidents Archives4 http://www.baaa-acro.com/
severe turbulence5 https://www.youtube.com/watch?v=KvgDrw81B0g
severe crosswinds6 https://www.youtube.com/watch?v=bMUdXJPUwm8
runway accidents7 http://www.cbsnews.com/news/plane-skids-off-runway-at-new-yorks-laguardia-airport/
survivable crashes8 http://www.cbc.ca/news/canada/north/plane-crash-near-resolute-bay-kills-12-1.1021035
Checking9 https://youtu.be/lzmJr1a-BHU
more detailed information on why a FAA approved child restraint device should be used on an aircraft10 http://csftl.org/leaving-on-a-jet-plane-the-csftl-guide-to-safe-air-travel-with-children/
recommend car seats that often meet the needs for traveling11 http://csftl.org/on-the-road-again/
CARES12 http://kidsflysafe.com/
locking clip13 http://www.cpsafety.com/articles/lockincss.aspx
https://csftl.org/when-to-use-a-locking-clip/
a tether connector strap (also known as a d-ring)14
http://carseatblog.com/12749/how-to-use-a-rear-facing-tether/
Go-Go Babyz Travelmate16 http://amzn.to/2k7M2Qf https://www.gogobabyz.com/product-i14550-c26-gogo_Kidz_Travelmate_.aspx
Diono Radian17 http://us.diono.com/convertible-boosters
carry straps18 http://amzn.to/2hWw1II http://us.diono.com/accessories/radian-carry-strap
Car Seat Travel Bag19 http://amzn.to/2hVDvM5 http://us.diono.com/accessories/radian-travel-bag150521115326
angle adjuster20 http://us.diono.com/accessories/angle-adjuster
Cosco Scenera NEXT21 http://www.coscokids.com/car-seats/convertible-car-seats
Safety 1st Guide 6522 http://safety1st.djgusa.com/en/djgusa/search/convertible-car-seats
Evenflo SureRide DLX 6523 http://www.evenflo.com/Products/Evenflo/Car_Seats/SureRide_DLX/
Super Car Seat Geek24 https://www.facebook.com/SuperCarSeatGeek


